Organising your photos is a question that all photographers ask themselves sooner or later. And yet there is no single answer.
Should images be classified by date, location, theme or project? What works perfectly for reportage, weddings or client commissions can quickly become ineffective when you're doing nature, landscape or travel photography over a number of years.
When thousands of images are accumulating, the challenge is no longer simply to store photos, but to be able to find them quickly, compare them over time, rework them, reuse them... without losing energy or creativity.
In this article, I share with you the way I organise my photos, based on several years of practice and adjustments. 😅 It's a long-term approach, directly linked to my overall workflow: from the ingestion of RAW files, through development, to final archiving on several discs.
It is neither a universal method nor a rule to be followed to the letter, but a coherent, tried and tested structure that you can adapt to your own way of photographing.
1. Why is organising photos a crucial issue for a photographer?
Organising your photos may seem like a secondary, almost administrative matter. However, as the years go by and you accumulate thousands, even tens of thousands of images, it's easy to become overwhelmed, this organisation is becoming a central issue in the photo workflow.
Poor organisation inevitably leads to :
And a photo that cannot be found is, in practice, an unusable photo. 😰
For the occasional photographer, the problem may remain limited. But once you start taking photographs on a regular basis - nature, landscape, travel, personal or professional projects - the issue changes completely. Images accumulate over several years, sometimes on several disks, with a variety of uses: processing, publication, printing, training, long-term archiving.
This is where organising your photos should no longer be thought of simply as storage, but as a working tool in its own right, in the same way as your camera body, lenses or RAW development software.
A good organisation must meet a number of essential needs:
Over time, I've come to realise that there isn't one universal method that works for all photographers. On the other hand, there are solid, adaptable principles that can be used to build a coherent, scalable and sustainable organisation.
In this article, I'll show you how I organise my photos, as a direct complement to my article on general workflow (from RAW ingest to final archiving). It is neither an absolute truth nor a fixed method, but a structure that has been tried and tested over the long term, designed for large volumes of images and for real use over several years.
2. Organising your photos in folders
Folder organisation is the physical basis of all image management. Even before talking about catalogues, software or advanced filters, there is a simple reality: files need to be stored somewhere, on one or more disks, with a simple, understandable and durable logic.
In this section, I'm probably going to surprise some photographers, because I don't organise my photos mainly by date. It's a very common method, and sometimes perfectly suitable, but in my case it proved impractical in the long term.
a) Organisation by date: a simple but limited solution
Sorting photos by date works very well in certain contexts:
In these situations, we start with a series of images, process them, deliver them and then archive them. A folder such as 2024-06-15_Mariage_Dupont is more than sufficient.
But for nature, landscape or travel photography, the issues are different. We often return to the same place several times, sometimes over a period of years, and the issue is no longer simply to know when the photo was taken, but where, in what context, and with what photographic intention.
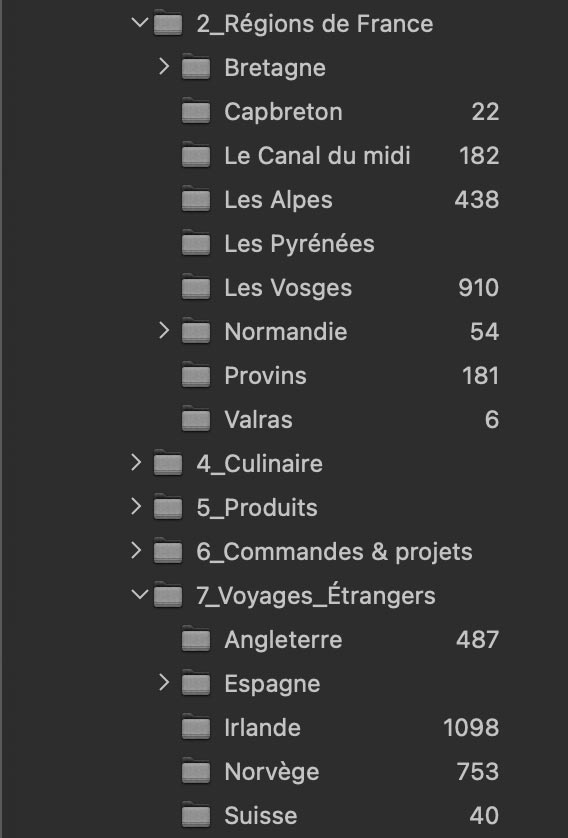
b) My choice: organisation by theme and location
With experience, I've noticed something very simple: 🧐 I always remember the places I've photographed, much less precise dates.
This observation has guided my entire organisation.
So I classify my photos by broad theme, then by geographical or photographic sub-themes. For example:
- Regions of France
- Brittany
- Normandy
- Pyrenees
- Foreign travel
- Norway
- England
- Spain
This structure allows me :
c) Why this organisation saves me time
When I'm looking for an image, I don't spontaneously think in terms of date., but in terms of :
Organised by theme, the first selection is already made before you even open the software. I don't need to go through dozens of chronological files : I go straight to the right place. 😎
This doesn't mean that the date disappears - it remains present everywhere (EXIF, renaming, filters), but it is no longer the main structure. It becomes a secondary tool, used at the right moment, rather than a permanent constraint.
In the next section, I'm going to show how this folder-based organisation fits in perfectly with :
3. Using filters, albums or collections
Organising by theme does not in any way mean abandoning chronology. Quite the contrary.
In all my files, the images are naturally in the order in which they were taken, by date. What's more, as soon as you import, I use intelligent file renaming which includes the last two digits of the year of capture. Results : even displayed by file name, photos remain chronologically consistent, whether in photo software, in the Finder on a Mac or in the Windows file explorer.
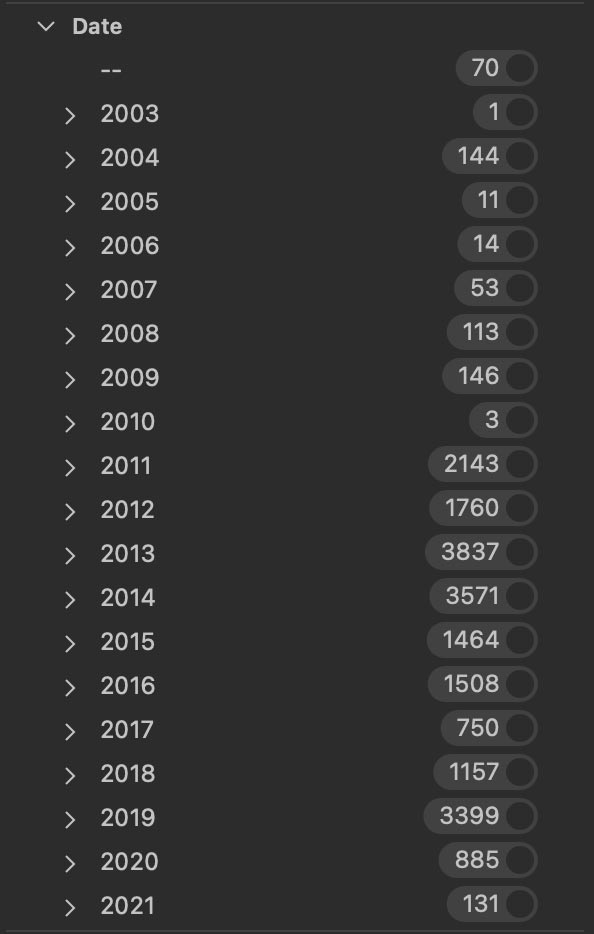
a) The date is still everywhere... but in the right place
All photos naturally contain their full EXIF data, including the capture date. This means that any :
In other words, the date never disappeared from my organisation. It's simply no longer the main folder structure, but an extremely powerful filtering tool, used only when I need it.
b) Why I don't just work with keywords 🔑
If I had to organise my photos in the opposite way, i.e. in strict chronological order and then recreate groupings by location or theme, the work would be much heavier.
This would mean :
Even though Artificial intelligence now makes it easier to recognise content, In my opinion, a clear organisation at file level is faster, clearer and more robust in the long term. (With Peakto or On1 Photo Raw)
c) Filters, albums and collections: the best of both worlds
When I need do more cross-curricular research, then I use albums or collections (depending on the software name).
For example:
These collections are created in the course of my work, never as a separate administrative task. They are a natural addition to the existing organisation, without complicating it.
d) Virtually instantaneous search
Thanks to this combination :
Most searches are already pre-filtered before you even open the software. Finding a specific image usually takes me a few seconds, without stress, without endless searching, and without relying on my memory.
This method is obviously not universal. There are many ways of organising your photos, all of which are valid depending on your practice. But for long-term nature, landscape and travel photography, it's the one that has given me the most comfort, speed and peace of mind.
How do you organise your photos?
4. Conclusion - An organisation dedicated to the long term and to creation
Organising your photos is not a question of fixed rules or a universal method. It is above all a personal reflection, which must be adapted to your photographic practice, your volume of images and your way of thinking.
In my case, my organisation by theme and location is enriched by :
gradually took shape through repeated experimentation and naturally proved to be the best fit. (And like a lot of people I got bored 😭 with it)
This approach allows me to :
There's nothing more frustrating than knowing a photo exists... but not being able to find it. Conversely, clear, coherent organisation brings real mental peace of mind: the mind is freed, available for what really matters: creation.
This method is obviously not universal. But for my nature, landscape and travel photography, practised over several years and with large volumes of images, it's the one that has offered me the most comfort, speed and stability.
👉 If you want to go further, this article is a direct complement to my article on the global photo workflow, in which I detail my entire workflow: from RAW file ingestion to final archiving on multiple disks.
If you are looking for If you are looking for training on Capture One Pro, DxO PhotoLab, or On1 Photo Raw, I invite you to visit my online shop. or again on my YouTube channel,
Thank you for visiting and reading,
Photographically yours,
David